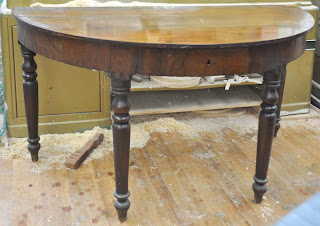
Repairs ... We love em ... If they could only talk; then theyd be even more interesting .... This pair of tables came in one at a time with the idea that we only had to put a leg back on one of them and patch a broken corner. However, they came in with a bureau that was a basket case when it arrived and looked like a million bucks when it left .... We fixed and delivered that piece first and when the client saw how her bureau had been transformed, she sent us the mate to the table above with instructions to tune them up and refinish the tops, which had suffered some serious damages over the years. So, as we worked with them, we dreamed up their story ... Who knows? Heres what we think..... Click the pictures to enlarge them as we go ...
 Heres the bureau ... When it came to us, it looked like it had been in a barn for quite a while ... The drawer supports had all collapsed and the drawers didnt run, more than half of the base was off, the moldings were flapping ... Backboards were missing ... Will did a good job getting it all back together. It took a few hours, but it was definitely worth doing ... When it left, it looked great. Heres the deal on the tables ...
 The builder was a skilled craftsmen. The inlays are nicely done, the veneers on the aprons appear to be hand sawn, and the tops of the pair of tables are pairs of bookmatched boards, 1,2,3 center middle outside ... The boards match .... not an accident .
 Heres the bureau ... When it came to us, it looked like it had been in a barn for quite a while ... The drawer supports had all collapsed and the drawers didnt run, more than half of the base was off, the moldings were flapping ... Backboards were missing ... Will did a good job getting it all back together. It took a few hours, but it was definitely worth doing ... When it left, it looked great. Heres the deal on the tables ...
 The builder was a skilled craftsmen. The inlays are nicely done, the veneers on the aprons appear to be hand sawn, and the tops of the pair of tables are pairs of bookmatched boards, 1,2,3 center middle outside ... The boards match .... not an accident .
 We opted for scraping rather then stripping ... We find when we strip we alchoices have to do a lot of sanding and that kills some of the handmadeness of the surfaces ... scrapings better in our opinion if you can do it ... The finish was not original and it was thin and flaky and actually shot off the front edge of the scraper as I worked.

 Heres an interesting thing .... The legs were all cut at the point where the arrow is and the legs that are below that point on the tables now have a different finish and are held on by short half inch diameter dowels (we know cause they wiggle and we fixed one that was broken off) and in some cases hinges ... It also looks like the detail that is on the legs at one time was also on the aprons and drawer fronts.
 One had a broken corner and a rotten spot that needed patching
Luckily I had a piece of crotch walnut with similar figure to make a patch
 All in, all done ... and ready for the next 50 years or so ...
 All in, all done ... and ready for the next 50 years or so ...


 The new shelving is going in a room that was built on to the house specifically for the pedal cars.
 When I look at the list of posts for the last two or three weeks, it looks like not much is going on, new projects wise.... A couple repairs, some metalwork, a woodshed and railing for my own home, a new camera .... like I said, not much going on ... Thats because, for the last three or four weeks we have been working on a large project and I, as yet, have not gotten it together to post the details. The design work started around the first of the year as construction was getting underchoice, and the project involves a roomful of paneling, a desk, a vanity and dressing table, two mirrors, the restoration of a pair of antique doors, a bar cabinet .... I think thats it for now. The construction on the addition is coming along and weve been working on the project since the middle of May, hoping to install everything in the next couple of weeks. The paneling post will be a long one and Ill post the other entries as I can make the time to do it.
 The project as it appeared in early January
 A close up of the desk model ... a claro walnut slab with a blackened steel base
 The fireplace surround and tv cabinet section of the roomful of walnut paneling.
 The recycled chestnut vanity


 The photo above is from my big Matisse book and it shows 16 of the 22 photos sent by Matisse to Etta Cone, showing states in the development of Large Reclining Nude, 1935. I wish I had photographed the various stages in the finishing of this table. I wouldnt have 22 photos, but Id have a bunch....
 The photos below were all taken with the florescent lights on. We werent totally happy until we turned them off and turned on the chandeliers that Jim cleaned and are still hanging in the finish room ... Nobody has florescents lights in their dining room anychoice...
 Two of our many varnish samples .. same color on the left, natural cherry on the right
 The underside is finished just like the top ... Watertown runners from Moin hardware.
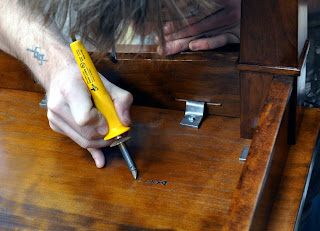 Will, burning in the mark and date
 Leg and apron and inlay
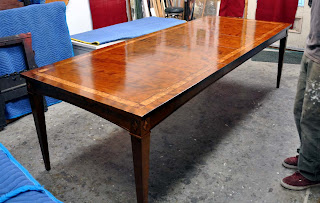 The shine under the regular lights
 The leaves

 10/1 Home stretch on the door project ... We had to go to the site yesterday to final refit the front door before final priming,coloring and rehanging. The molding miters will need some patch and fill work and Tom of Keefe and Wesner Architects (restoration specialists) turned us on to a product by West Systems called microballoons. You add this sort of mysterious powdery stuff to their epoxy and it makes what they refer to as a fairing compound. Weatherproof, durable, carveable, sandable, paintable .... We made a sample Tuesday and its pretty amazing stuff. More on that later ... Click photos to enlarge them.
 The opening with its granite sill
 The inside view after refitting ... There was soooo much paint on the jamb edges that the door was thicker than the rabbett in which it fits. Over the years, it seems that the carpenters, when recoloring and adding new hardware, had rehung the door further and further from its original location until when we first fitted it yesterday, it was about 3/16ths pround of its jambs. Luckily, we were able to rerout the jambs in place and now it swings freely, fits flush and doesnt bind ... well add new weatherstripping after its painted and rehung.
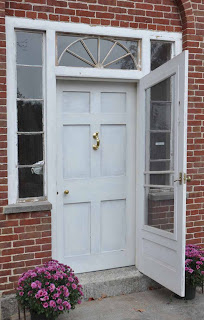 From the outside with the new knocker in place
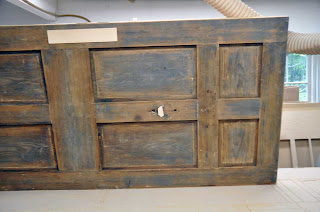 Trevor has made one continuous patch to cover the historical assortment that has accumulated on the outside ... The new knocker will cover the old knocker holes .... the small patch was a knot that had fallen out ...
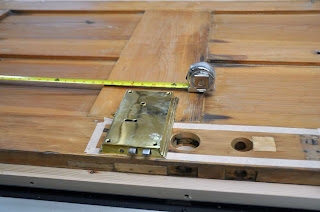 And weve laid out the Ball & Ball lockset location )love their stuff). Hell fill the round holes and do another one patch on the inside.
 Interior view of the original entrychoice ...
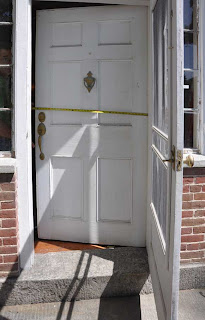 On our first site visit, we took measurements to estimate a price to copy the existing door. This house has beautiful, original, cut granite foundations and note the granite sill detail ... You dont see that often ...
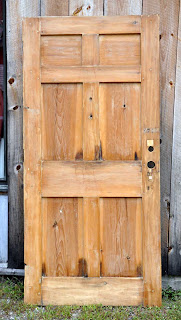 Back from the strippers ... interior view
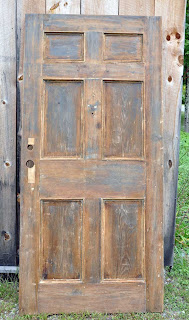 Exterior view showing clearly the patches that accumulated over the years as hardware and locks were changed ..
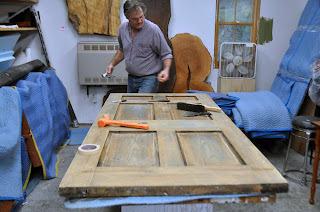 The door with all its exterior panel molding removed. To get the first one out we drove the two nails holding the molding through and then pried it up. Once that one was out, the others could be removed with their nails ....
 Paint and stripper remained under the hand plane shaped moldings
 The nails ... two per strip of molding, 8 per panel, carefully and symmetrically placed by the original maker. Note the square ground nailset for setting the nails through ... Well patch the holes neatly, and make accomodtions for the new Ball and Ball hardware ... Itll be sweet when its repainted and Im sure it will be happy to get back home ....